This is a tutorial on how to start developing Web APIs with EF Migrations on Ubuntu/Linux Mint using SQL Server. This project also works on Windows, just need to update the connection string.
First install .Net Core: https://www.microsoft.com/net/core#linuxubuntu
Then install Visual Studio Code:
https://code.visualstudio.com/Download
If your VS Code main window is blank, edit start command and add code --disable-gpu
Then install SQL Server: https://docs.microsoft.com/en-us/sql/linux/sql-server-linux-setup-ubuntu And SQL Server command-line tools: https://docs.microsoft.com/en-us/sql/linux/sql-server-linux-setup-tools#ubuntu Now you can test the instalation: https://docs.microsoft.com/en-us/sql/linux/sql-server-linux-connect-and-query-sqlcmd
Now let's create the project, there are two options, via dotnet new and yeoman.
dotnet new webapi
You should get this: The template "ASP.NET Core Web API" created successfully.
Then restore packages, build and run:
dotnet restore
dotnet build
dotnet run
A server will start on localhost:5000. You can test sample controller by navigating to http://localhost:5000/api/values ,will get ["value1","value2"].
At this point you can open the folder with Visual Studio Code. If it suggests to install some extensions, just do it.
Add a folder Contextand a file inside it Context.cs. inside it add:
using Microsoft.EntityFrameworkCore;
using System.ComponentModel.DataAnnotations;
using System.ComponentModel.DataAnnotations.Schema;

namespace testApi.Context
{
    public class AppDbContext : DbContext
    {
        public AppDbContext(DbContextOptions<AppDbContext> options)
            : base(options)
        { }

        public DbSet<Item> Items { get; set; }
    }

    public class Item
    {
        [DatabaseGenerated(DatabaseGeneratedOption.Identity)]
        [Key]
        public int Id { get; set; }
        public string Name { get; set; }
    }
}
Always change the namespace to match your app's namespace.
Now add a connection string in appsettings.json and/or appsettings.Development.json:
  "ConnectionStrings": {
    "DefaultConnection":"Data Source=localhost;Initial Catalog=AppDbContext;User ID=sa;Password=TypeYourPassHere"
    },
Now edit ConfigureServices in Startup.cs:
        public void ConfigureServices(IServiceCollection services)
        {
            // Add framework services.
            services.AddMvc();
            services.AddDbContext<AppDbContext>(options =>
                    options.UseSqlServer(Configuration.GetConnectionString("DefaultConnection")));
        }
You also need to add some packages, so edit CoreMigrationsWebApi.csproj or what name you gave it:
<Project Sdk="Microsoft.NET.Sdk.Web">

  <PropertyGroup>
    <TargetFramework>netcoreapp1.1</TargetFramework>
  </PropertyGroup>

  <ItemGroup>
    <Folder Include="wwwroot\" />
  </ItemGroup>

  <ItemGroup>
    <PackageReference Include="Microsoft.AspNetCore" Version="1.1.1" />
    <PackageReference Include="Microsoft.AspNetCore.Mvc" Version="1.1.2" />
    <PackageReference Include="Microsoft.Extensions.Logging.Debug" Version="1.1.1" />
    <PackageReference Include="Microsoft.EntityFrameworkCore.SqlServer" Version="1.1.1" />
    <PackageReference Include="Microsoft.EntityFrameworkCore.SqlServer.Design" Version="1.0.0" />
    <PackageReference Include="Microsoft.EntityFrameworkCore.Tools" Version="1.0.0"/>
    <PackageReference Include="Microsoft.EntityFrameworkCore.Design" Version="1.0.3" />
  </ItemGroup>

  <ItemGroup>
    <DotNetCliToolReference Include="Microsoft.EntityFrameworkCore.Tools.DotNet" Version="1.0.0"/>
  </ItemGroup>

</Project>
At this point you can create the database by running:
dotnet ef migrations add InitialMigration
dotnet ef database update
P.S. always run these commands after making a change in code or adding a package:
dotnet restore
dotnet build
Now that we have the database set up, we can add a controller with basic CRUD operations:
using System.Linq;
using Microsoft.AspNetCore.Mvc;
using testApi.Context;
using testApi.ViewModels;

namespace CoreMigrationsWebApi.Controllers
{
    [Route("api/[controller]")]
    public class ItemsController : Controller
    {
        private readonly AppDbContext _context;

        public ItemsController(AppDbContext context)
        {
            _context = context;
        }

        // GET api/items
        [HttpGet]
        public IActionResult Get()
        {
            var dbItems = _context.Items.ToList();
            var viewModel = new ItemsViewModel
            {
                Items = dbItems.Select(x => new ItemViewModel
                {
                    Id = x.Id,
                    Name = x.Name,
                }).ToList(),
                Count = dbItems.Count,
            };

            return Ok(viewModel);
        }

        // GET api/items/5
        [HttpGet("{id}")]
        public IActionResult Get(int id)
        {
            var dbItem = _context.Items.FirstOrDefault(x => x.Id == id);

            if (dbItem == null)
            {
                return NotFound("item not found!");
            }

            return Ok(new ItemViewModel { Id = dbItem.Id, Name = dbItem.Name });
        }

        // POST api/items
        [HttpPost]
        public IActionResult Post([FromBody]ItemViewModel item)
        {
            var newDbItem = new Item { Name = item.Name };

            try
            {
                _context.Items.Add(newDbItem);
                _context.SaveChanges();
            }
            catch
            {
                return BadRequest();
            }

            return Get(newDbItem.Id);
        }

        // PUT api/items/5
        [HttpPut("{id}")]
        public IActionResult Put(int id, [FromBody]ItemViewModel item)
        {
            var dbItem = _context.Items.FirstOrDefault(x => x.Id == id);
            if (dbItem == null)
            {
                return NotFound("item not found!");
            }

            try
            {
                dbItem.Name=item.Name;
                _context.SaveChanges();
            }
            catch
            {
                return BadRequest();
            }

            return Get(id);
        }

        // DELETE api/items/5
        [HttpDelete("{id}")]
        public IActionResult Delete(int id)
        {
            var dbItem = _context.Items.FirstOrDefault(x => x.Id == id);
            if (dbItem == null)
            {
                return NotFound("item not found!");
            }

            try
            {
               _context.Items.Remove(dbItem);
               _context.SaveChanges();
            }
            catch
            {
                return BadRequest();
            }

            return Ok("Delete successful");
        }
    }
}
You will also need the view models located in ViewModels folder.
namespace testApi.ViewModels
{
    public class ItemViewModel
    {
        public int Id { get; set; }
        public string Name { get; set; }
    }
}
using System.Collections.Generic;

namespace testApi.ViewModels
{
    public class ItemsViewModel
    {
        public List<ItemViewModel> Items { get; set; }
        public int Count { get; set; }
    }
}
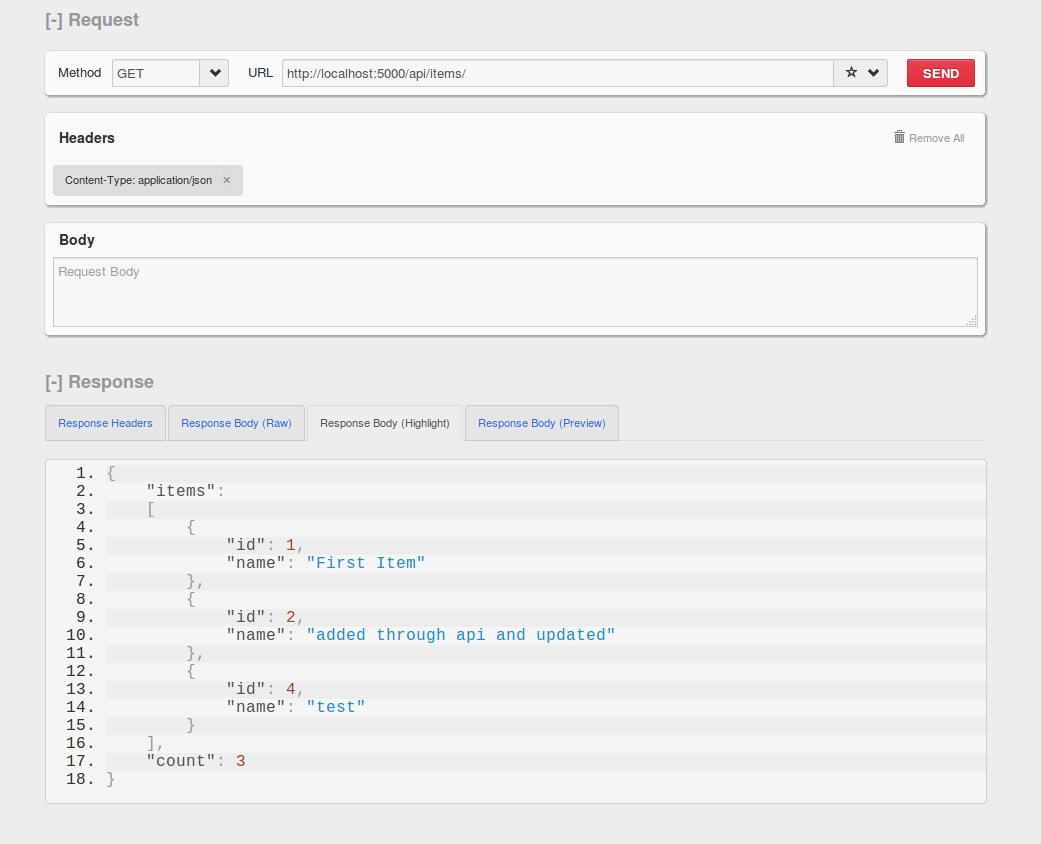
Now run the project and test the endpoints with Postman or RESTClient or any other you prefer. Don't forget about Content-type: application/json; header.
Here is an example for get/items: