Adoption Bot is a user care Chatbot built with Power Virtual Agents for Microsoft Teams (PVA). Out of the box, Adoption Bot answers 100+ common questions about Microsoft 365 and Teams. You can edit the included topics, add your own topics, and ingest existing FAQs. If users need additional help, Adoption Bot can connect them to experts or even be extended to open service tickets with premium Flow connectors.

Benefits:
- No code Bots have quick time to value and net quick win for M365 project team
- Capabilities available in the Power Virtual Agents app in Microsoft Teams are available as part of select Microsoft 365 subscriptions
- Drive down support costs with fewer service desk tickets*
*Use of bots to handle employee questions reduces the number of IT and HR support tickets by 10% to 15%. Source: Forrester Consulting Total Economic Impact™ Of using Microsoft Teams as a platform and Teams with Power Platform
Adoption Bot Overview and Demo on YouTube
Adoption Bot QnA Pairs for hosted in 41+ languages
Free for most Enterprise customers. Adoption Bot and Power Virtual Agents app in Microsoft Teams are available as part of most Microsoft 365 subscriptions and use standard connectors.
- Subscription that includes Power Virtual Agents for Teams. Most plans except GCC, A1 and SUB SKUs Get access to Power Virtual Agents - Power Virtual Agents | Microsoft Docs
- Power Virtual Agents for Teams App (do not use PVA web)
- Microsoft Teams Team to host the Bot/Dataverse
- Microsoft Teams Team for Ask an Expert and Submit Feedback Escalation to land in
- Teams Admin rights to upload custom app and set Teams App Setup Policy
Create your Dataverse for Teams environment
You can skip this step if you already have a Dataverse for Teams environment for the team that will be managing the AdoptBot.
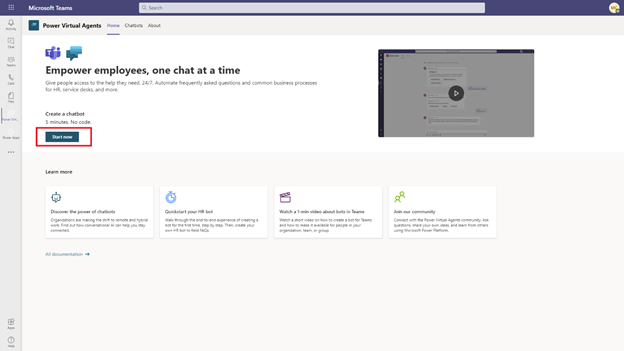
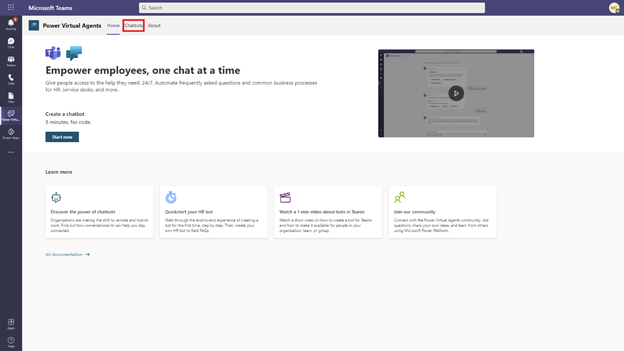
- Search for Power Virtual Agents Teams app in Microsoft Teams app store.

- Add the app in Microsoft Teams and will land you in the homepage. Select Start now.
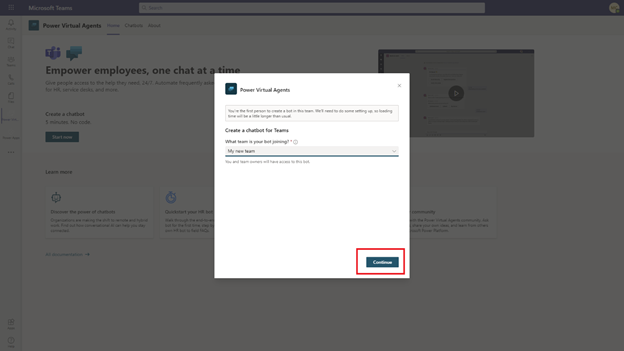
- Select the team that will be managing the Bot. This Team is the Dataverse environment that you will import the Adoption Bot solution into later.
- Wait for the Dataverse for Teams environment to be created in 30 seconds to a minute.
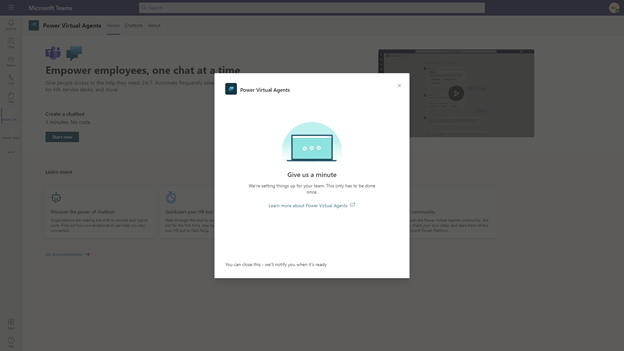
- Once the environment is created you will be redirected to Create a new bot. Exit out of it by clicking X in upper right.
Import the bot into your Dataverse for Teams environment
Please follow the instruction in the previous section if you do not have a Dataverse for Teams environment created yet. Please note that the following instruction also applies to Dataverse full environment but that will require Power Platform licenses in addition to standard Office license.
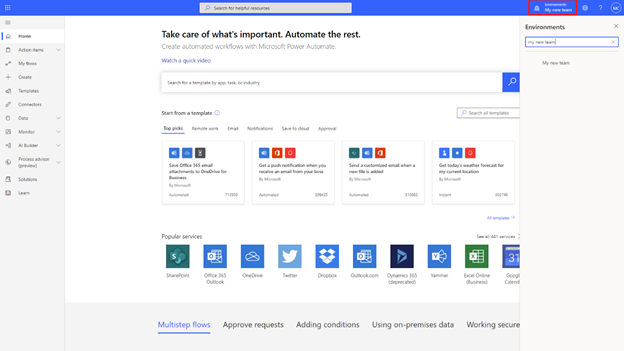
- Go to www.flow.microsoft.com and select the environment that you would like to own the bot in from the environment picker on the top right corner. IMPORTANT: Choose the Team you created in step 3 above.
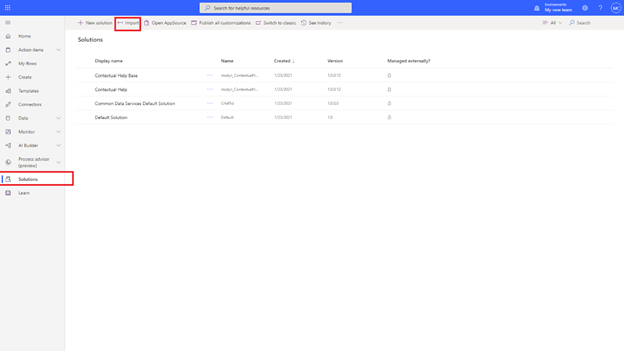
- Go to Solutions from the left nav menu and select Import.
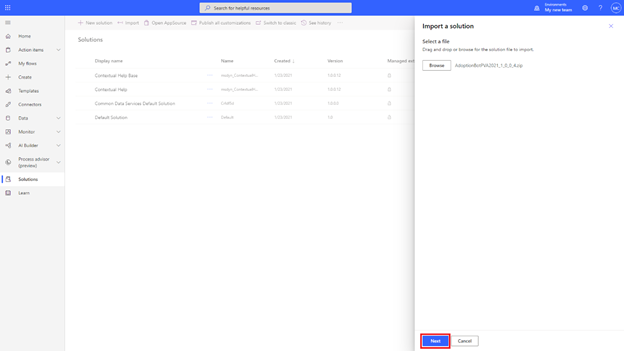
- Select the AdoptionBotPVA package .zip file that you have downloaded from the Github repo. Select Next.
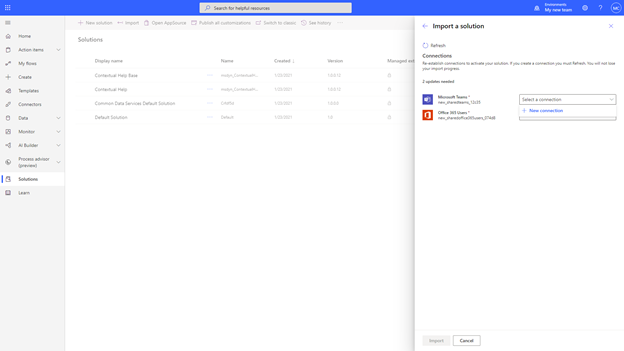
- Read the summary page and select Next again. You will be asked to provide Connection for the solution. You can select an existing connection or create a new one by following the instruction of the menu. Skip to step 7 if you don’t need to create a new connection. Note: Consider using a service account for the connections as notification cards originate from this account. The service account will need a license that includes Exchange Online mailbox.
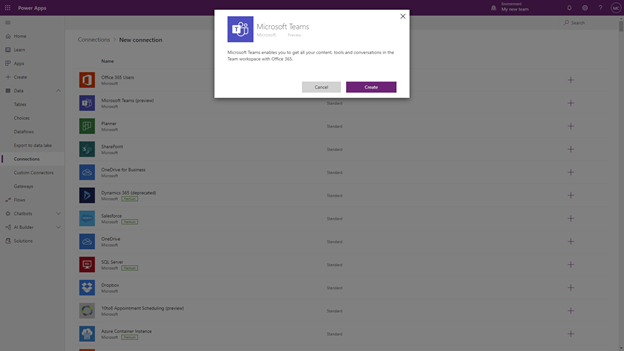
- Optional – create a new connection. By selecting New connection, a new tab will be opened and select Create on the dialog. Sign in the account that you want the connector to be run as.
- Once the connection is created, return to the previous tab in Power Automate and select Refresh to get the latest connections.
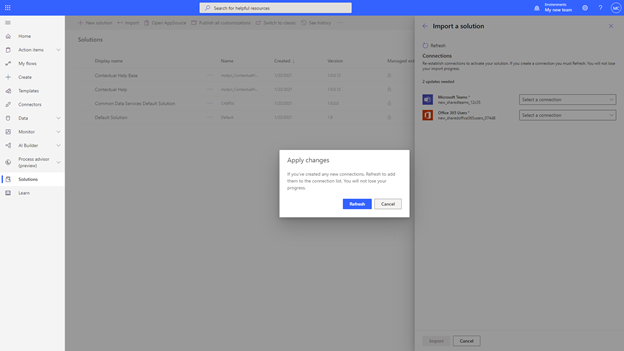
-
Now select the connection you want to use for the bot. And do the same for the Office 365 Users connection by selecting and existing one or follow steps 5 and 6 again to create a new Office 365 Users connection.
-
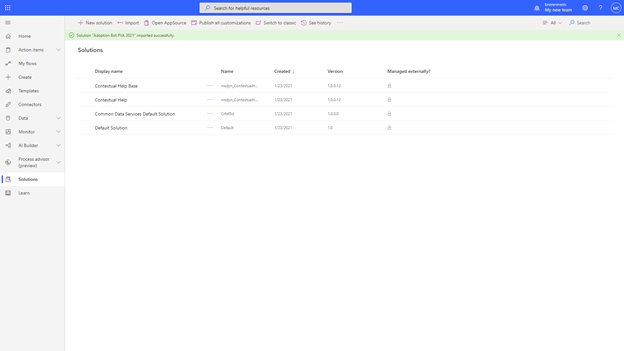
Select Import. You will see the status bar showing the solution is being imported. This can take a few minutes.

- Once the solution is imported you will see the following success message.
Turn on and configure connection for the Flows
Once the solution file is imported, we need to go to configure the connections used in the Power Automate flow of the adoption bot and turn them on.
- Select Default solution and filter the displayed components to Cloud flows on the top right corner.
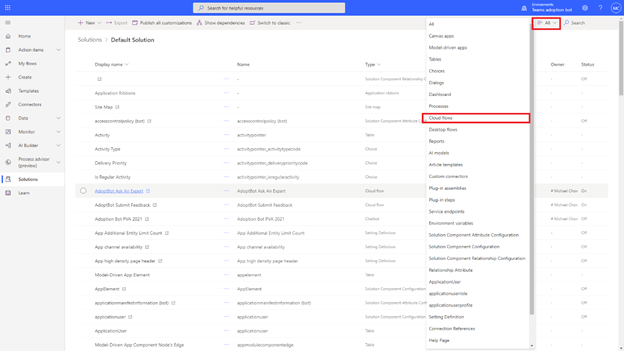
- You will see two flows AdoptBot Ask an Expert and AdoptBot Submit Feedback.
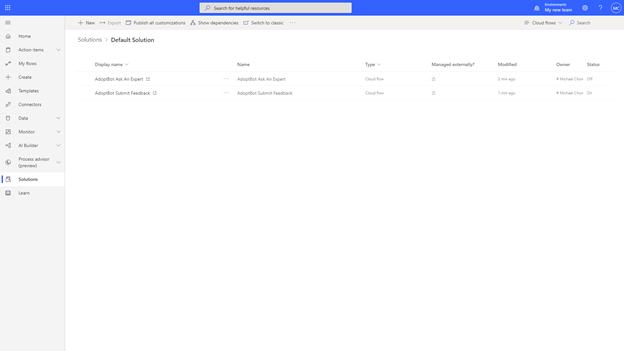
-
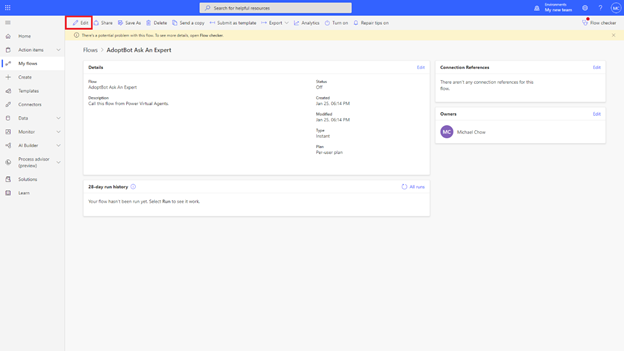
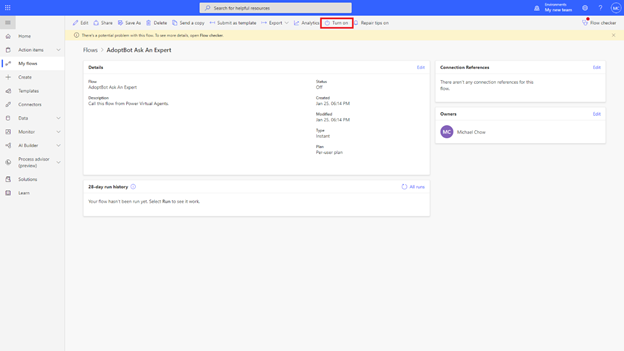
Select AdoptBot Ask an Expert. The steps are identical for both flows. You will need to configure both flows with the same steps below.
-
Select Edit on the top menu.
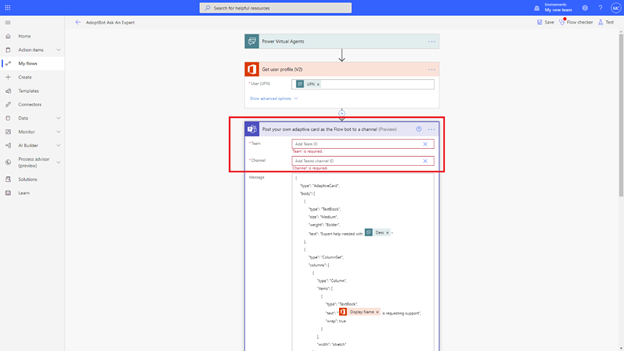
- Select the connections for the Office 365 user and Microsoft Teams connector.

- Select the Microsoft Teams connector. Remove the content in the Team field and the Channel field. Replace it with the team and the channel where your experts will be presented to handle user’s Ask an Expert request and view their feedback.
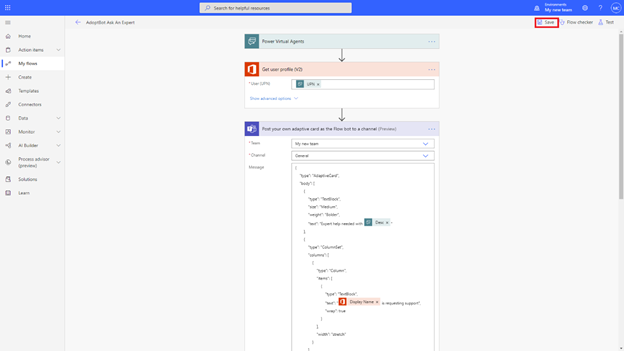
- Select Save on the top right corner.
- Return to flow details by selecting the back arrow on the top left.
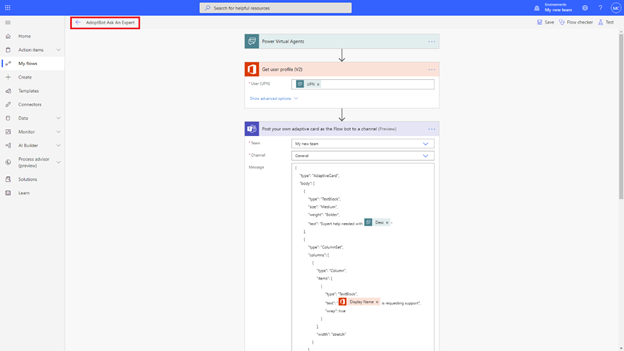
- Select Turn on to turn on the flow. Repeat the same for AdoptBot Submit Feedback flow.
Test the bot in Power Virtual Agents
Go to Power Virtual Agents Teams app by following the first step in the ‘Create your Dataverse for Teams environment’ section. If you imported the bot to a Dataverse full environment, then you need to author the bot from Power Virtual Agents web portal by signing into www.powerva.microsoft.com
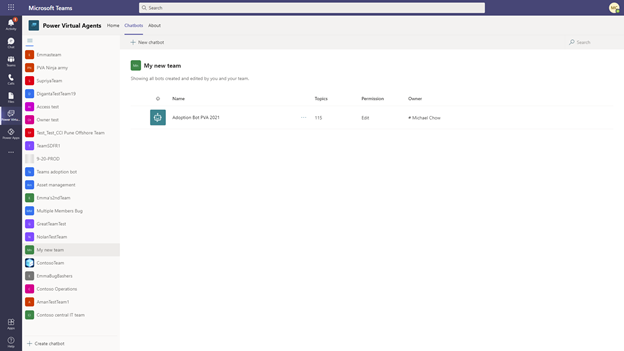
- Select Chatbots tab at the top of Power Virtual Agents Teams app
- Select the team name of the Dataverse for Teams environment that you have imported the bot in. Select the Adoption Bot to enter embedded authoring for the bot in Teams.
- Chat with your AdoptBot in PVA embedded authoriing - Test bot pane. Ask common questions like "Guests in Teams".
Note: You may want to turn off topics, edit topics or add new topics using Power Virtual Agents App in Teams. Create and edit topics in your Power Virtual Agents bot.
Note: You can also extract topics from webpages or online files Extract content from webpages or online files
Test the Flows for Ask an Expert and Submit feedback
-
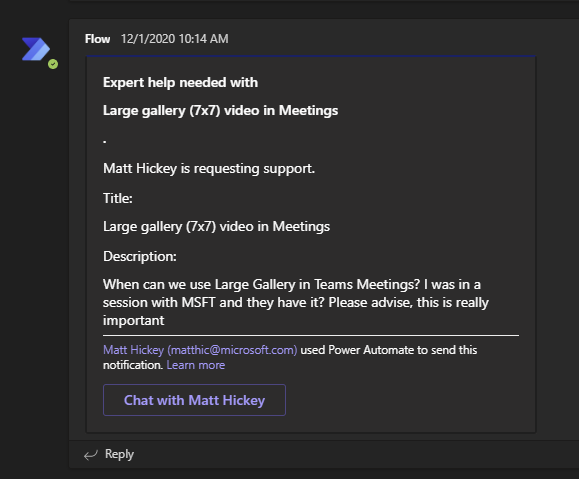
Type Ask an Expert in an AdoptBot conversation.
-
Enter a title for your request
-
Enter a description for your request
-
Check the Team and channel you configured in Step 6 (Turn on and configure connection for the Flows) for a new Adaptive Card.
- Type Submit Feedback and test Submit Feedback flow as per instructions above.
IMPORTANT: If Ask An Expert or Submit Feeback Flow fails with "Sorry the Bot can't talk for a while.." you need to remove and re-add the Ask An Expert Action in the Escalate topic.

-
Click the ellipsis next to Ask An Expert Flow Action and Choose Delete
-
Click + Add node in PVA conversation tree and choose Call an Action - AdoptBot Ask An Expert
-
Remap the 3 input variables (UPN -> bot.UserId, Title -> Var_AskTitle, Desc -> Var_AskDesc)
-
Save the Escalate topic and re-test in PVA Test UI
Brand Adoption Bot for your organization
Optionally, you can give the bot a name that makes sense to your organization. To change the Bot name and icon, click Manage and Details. Click save at the top.

Publish the bot to your end users
Now that you have tried out the bot and is satisfied with its content, it’s time to make it available to your employees.
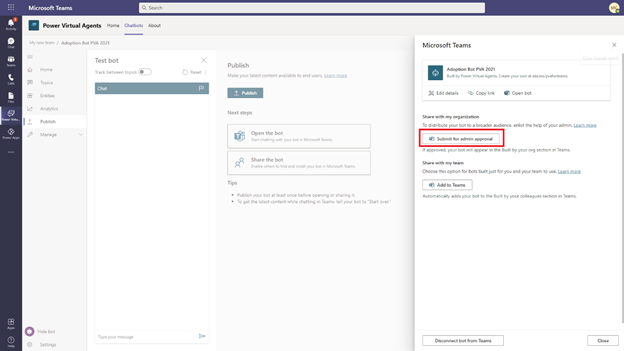
- Go to Publish from the left navigation panel. Select the Publish button and proceed with the confirmation dialog to make the bot content live.

- Select Share the bot and select Turn on Teams so end users can chat with the bot in Microsoft Teams.

- Select Submit for admin approval on the panel.
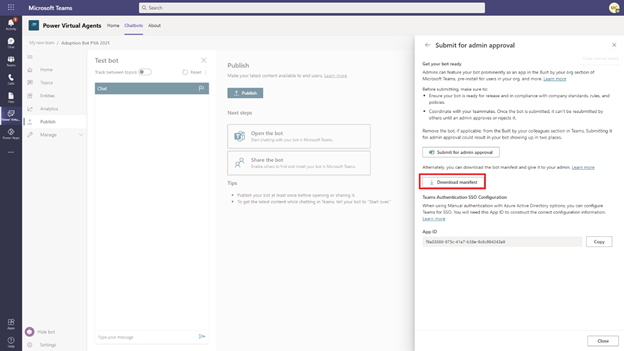
- Select Download manifest and provide the description and other information relevant to your bot.
-
Once you have downloaded the Teams app manifest for your bot, extract the teamsApp.zip file on your computer and edit the manifest.json file.
-
Replace AppID with 6c8c0828-bd30-4c89-900b-5656ac58683c and save the manifest.json
-
Rezip the 3 files (Manifest and two icons)
Upload the bot to your tenant app store
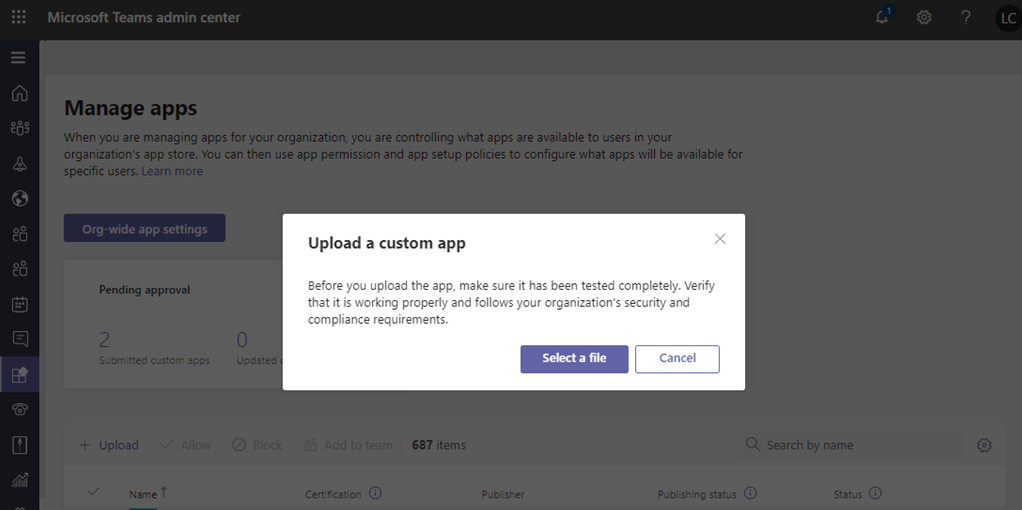
When you publish a custom Teams app, it's available to users in your organization's app store.
Note: adding Apps to your tenant requires upload custom apps to be enabled in policy. See this article for details Publish a custom app by uploading an app package
-
Launch Microsoft Teams admin center.
-
In the left navigation of the Microsoft Teams admin center, go to Teams apps > Manage apps.
-
Click Upload, click Select the zip file you edited in the prior step.
Pin and install the app for users to discover
By default, for users to find the app they have to go to your organization's app store and browse or search for it. To make it easy for users to get to the app, you can pin the app to the app bar in Teams.
-
In the left navigation of the Microsoft Teams admin center, go to Teams apps > Setup policies.
-
Select the policy by clicking to the left of the policy name, and then select Edit.
-
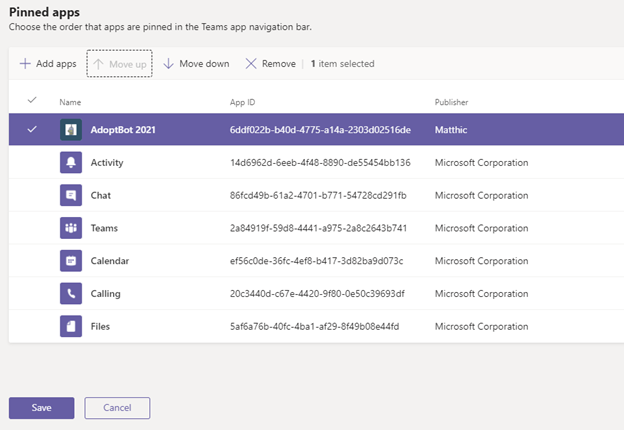
Under Pinned apps, select Add apps.
-
In the Add pinned apps pane, search for the apps you want to add, and then select Add. You can also filter apps by app permission policy. When you've chosen your list of apps to pin, select Add.

- Arrange the apps in the order that you want them to appear in Teams, and then select Save.
See this article for additional details: Manage app setup policies in Microsoft Teams
Make Adoption Bot your own
- Rename the Bot to something that malkes sense to your organization
- Review the included topics and remove or edit as you see fit.
- Add your own topics. A best practice is to look at top help desk tickets and craft topics that map to top use questions.
- Use Create topics from existing online support content to automatically extract topics from your existing support documentation.
Special thanks to contributors Erik Olsson, Aditya Challapally, Michael Chow, Jong Hoon Moon, Belinda Parker and Nidhi Shandilya who helped create and launch this app template.
This project welcomes contributions and suggestions. Most contributions require you to agree to a Contributor License Agreement (CLA) declaring that you have the right to, and actually do, grant us the rights to use your contribution. For details, visit https://cla.opensource.microsoft.com.
When you submit a pull request, a CLA bot will automatically determine whether you need to provide a CLA and decorate the PR appropriately (e.g., status check, comment). Simply follow the instructions provided by the bot. You will only need to do this once across all repos using our CLA.
This project has adopted the Microsoft Open Source Code of Conduct. For more information see the Code of Conduct FAQ or contact [email protected] with any additional questions or comments.
This project may contain trademarks or logos for projects, products, or services. Authorized use of Microsoft trademarks or logos is subject to and must follow Microsoft's Trademark & Brand Guidelines. Use of Microsoft trademarks or logos in modified versions of this project must not cause confusion or imply Microsoft sponsorship. Any use of third-party trademarks or logos are subject to those third-party's policies.