Yuedong Chen
·
Haofei Xu
·
Qianyi Wu
·
Chuanxia Zheng
Tat-Jen Cham
·
Jianfei Cai
Paper | Project Page | Code | Model & Data 🤗

- Setup Environment
- Download Datasets
- Testing
- Training
- Rendering Video
- Use Your Own Data
- Miscellaneous
This project is developed and tested on a CUDA11 device. For other CUDA version, manually update the requirements.txt file to match the settings before preceding.
git clone --recursive https://github.com/donydchen/matchnerf.git
cd matchnerf
conda create --name matchnerf python=3.8
conda activate matchnerf
pip install -r requirements.txt
Troubleshooting:
Run on CUDA-12
This project has also been tested in an environment using CUDA 12. The recommended PyTorch installation is:pip install torch==2.1.0 torchvision==0.16.0 --index-url https://download.pytorch.org/whl/cu121Failed when rendering video
To render video outputs, `ffmpeg` must be installed on your system. You can verify the installation by running `ffmpeg -version`. If `ffmpeg` is not found, you can install it using:conda install ffmpegFailed when calculating SSIM scores
Due to compatibility issues, this project depends on an older version of `scikit-image`. Please install the appropriate version using:pip install scikit_image==0.19.2-
Download the preprocessed DTU training data dtu_training.rar and Depth_raw.zip from original MVSNet repo.
-
Extract 'Cameras/' and 'Rectified/' from the above downloaded 'dtu_training.rar', and extract 'Depths' from the 'Depth_raw.zip'. Link all three folders to
data/DTU, which should then have the following structure
data/DTU/
    |__ Cameras/
    |__ Depths/
|__ Rectified/- Download nerf_synthetic.zip and extract to
data/nerf_synthetic.
- Download nerf_llff_data.zip and extract to
data/nerf_llff_data.
- Download tnt_data.zip and extract to
data/tnt_data.
Download the pretrained model matchnerf_3v.pth and save to configs/pretrained_models/matchnerf_3v.pth, then run
python test.py --yaml=test --name=matchnerf_3vIf encounters CUDA out-of-memory, please reduce the ray sampling number, e.g., append --nerf.rand_rays_test==4096 to the command.
Performance should be exactly the same as below,
| Dataset | PSNR | SSIM | LPIPS |
|---|---|---|---|
| DTU | 26.91 | 0.934 | 0.159 |
| Real Forward Facing | 22.43 | 0.805 | 0.244 |
| Blender | 23.20 | 0.897 | 0.164 |
| Tanks and Temples | 21.94 | 0.840 | 0.258 |
Download the GMFlow pretrained weight (gmflow_sintel-0c07dcb3.pth) from the original GMFlow repo, and save it to configs/pretrained_models/gmflow_sintel-0c07dcb3.pth, then run
python train.py --yaml=trainpython test.py --yaml=test_video --name=matchnerf_3v_videoResults (without any per-scene fine-tuning) should be similar as below,
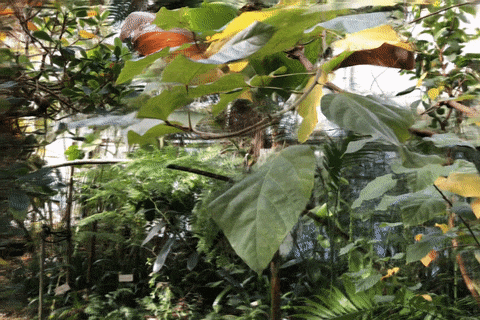
Visual Results
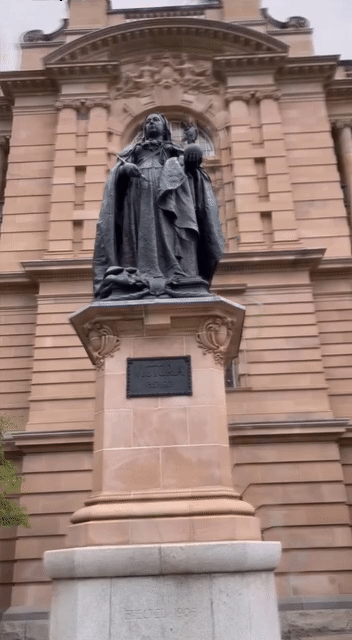
DTU: scan38_view24
Blender: materials_view36
Real Forward Facing: leaves_view13
- Download the model (matchnerf_3v_ibr.pth) pretrained with IBRNet data (follow 'GPNR Setting 1'), and save it to
configs/pretrained_models/matchnerf_3v_ibr.pth. - Following the instructions detailed in the LLFF repo, use img2poses.py to recover camera poses.
- Update the colmap data loader at
datasets/colmap.pyaccordingly.
We provide the following 3 input views demo for your reference.
# lower resolution but fast
python test.py --yaml=demo_own
# full version
python test.py --yaml=test_video_own
The generated video will look like,
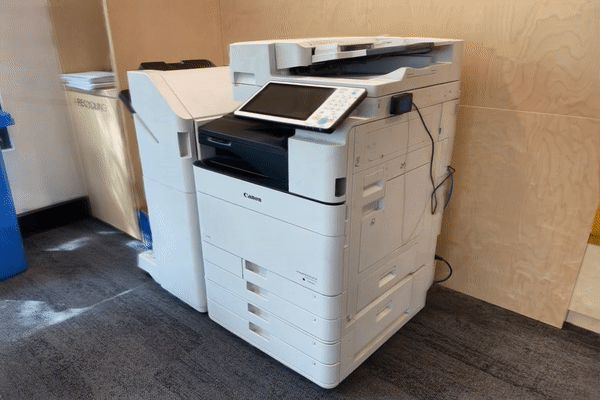
Demo: own data, printer
If you use this project for your research, please cite our paper.
@article{chen2025explicit,
  title={Explicit correspondence matching for generalizable neural radiance fields},
  author={Chen, Yuedong and Xu, Haofei and Wu, Qianyi and Zheng, Chuanxia and Cham, Tat-Jen and Cai, Jianfei},
  journal={IEEE Transactions on Pattern Analysis and Machine Intelligence},
  year={2025},
  publisher={IEEE}
}This implementation borrowed many code snippets from GMFlow, MVSNeRF, BARF, GIRAFFE and MVSGaussian. Many thanks for all the above mentioned projects.