uREPL is an in-game powerful REPL environment for Unity3D that supports following functions:
- Any Unity-supported C# code evaluation at run time.
- Emacs-like keyboard shortcuts.
- Multi-Line input.
- Customizable completions.
- Command definition just by adding an attribute.
- GameObject and Component inspector.
- Output logs.
- History.
- Mac / Windows
- Unity 2017.x .NET 4.6 (from v0.5.0)
- Unity 5.x .NET 3.5 (until v0.4.0)
- Unity Package
- Download the latest .unitypackage from Release page.
- Git URL (UPM)
- Add
https://github.com/hecomi/uREPL.git#upmto Package Manager.
- Add
- Scoped Registry (UPM)
- Add a scoped registry to your project.
- URL:
https://registry.npmjs.com - Scope:
com.hecomi
- URL:
- Install uREPL in Package Manager.
- Add a scoped registry to your project.
- Select menu from
Assets > Create > uREPLto instantiate auREPLprefab. - If you have no
EventSystem, add it fromHierarchy > Create > UI > EventSystem. - Input the code into the input filed, then press the Enter key to submit and evaluate it.
| Key | Description |
|---|---|
ctrl + a |
move to head. |
ctrl + e |
move to end. |
ctrl + f, right arrow |
move forward. |
ctrl + b, left arrow |
move back. |
ctrl + h, backspace |
remove character before cursor position. |
ctrl + d |
remove character after cursor position. |
ctrl + k |
remove all characters after cursor position. |
ctrl + l |
clear all outputs. |
ctrl + m |
toggle single-line / multi-line mode. |
ctrl + n, up arrow |
show next history. |
ctrl + p, down arrow |
show previous history. |
ctrl + tab |
show completions. |
enter |
run input command. |
F1 |
toggle window display on/off. |
| Key | Description |
|---|---|
ctrl + n, up arrow |
select lower item. |
ctrl + p, down arrow |
select upper item. |
tab, enter |
insert selected completion. |
esc |
hide completions. |
You can add commands by adding a [uREPL.Command] attribute to static methods.
public class CommandTest
{
	// Given from somewhere.
	static public GameObject gameObject;

	// This method can be called without class name.
	// $ ShowCurrentSelectedObject() ⏎
	[uREPL.Command]
	static public string ShowCurrentSelectedObject()
	{
		return gameObject.name;
	}

	// This method can be called by the given name.
	// $ selected ⏎
	[uREPL.Command(name = "selected")]
	static public string ShowCurrentSelectedObject2()
	{
		return gameObject.name;
	}

	// Completion view show the given description.
	[uREPL.Command(name = "selected2", description = "show the selected gameobject name.")]
	static public string ShowCurrentSelectedObject3()
	{
		return gameObject.name;
	}
}uREPL automatically convert the command format into the actual code.
public class CommandTest
{
	// '$ print "\"hoge hoge\"" ⏎' will be replaced with:
	// CommandTest.Print("\"hoge hoge\"");
	[uREPL.Command(name = "print")]
	static public void Print(object obj)
	{
		Debug.Log(obj);
	}

	// Supports an overloaded command.
	[uREPL.Command(name = "print")]
	static public void Print(string value1, int value2, float value3)
	{
		Debug.LogFormat("string: {0}, int: {1}, float: {2}", value1, value2, value3);
	}
}From v0.4.0, you can register and unregister commands in runtime.
using UnityEngine;

public class RuntimeCommandTest : MonoBehaviour
{
    void OnEnable()
    {
        uREPL.RuntimeCommands.Register("func1", () => Debug.Log("hoge"), "output hoge");
        uREPL.RuntimeCommands.Register("func2", x => Debug.Log(x), "outout given argument");
        uREPL.RuntimeCommands.Register("func3", (x, y) => Debug.Log((int)x * (int)y), "multiply arg0 by arg1");
        uREPL.RuntimeCommands.Register("func4", (x, y, z) => Debug.Log(x + " " + y + " " + z), "output all arguments");
        uREPL.RuntimeCommands.Register("func5", (int x) => Debug.Log(x), "output int value");
        uREPL.RuntimeCommands.Register("func6", (string x, float y) => Debug.Log(x + " is " + y), "output arg0 is arg1");
        uREPL.RuntimeCommands.Register("func7", (Vector3 pos, Quaternion rot, Vector3 scale) => Debug.Log(pos + " " + rot + " " + scale), "output unity-type values.");
    }

    void OnDisable()
    {
        uREPL.RuntimeCommands.Unregister("func1");
        uREPL.RuntimeCommands.Unregister("func2");
        uREPL.RuntimeCommands.Unregister("func3");
        uREPL.RuntimeCommands.Unregister("func4");
        uREPL.RuntimeCommands.Unregister("func5");
        uREPL.RuntimeCommands.Unregister("func6");
        uREPL.RuntimeCommands.Unregister("func7");
    }
}- If types are omitted, they become
System.Object. - If types are given, arguments are automatically converted into them, and output an error if it failed.
- You cannot use overload.
- At most 3 arguments now.
- help
- show keybinds.
- commands
- show all commands.
- close
- close uREPL window.
- exit
- exit game.
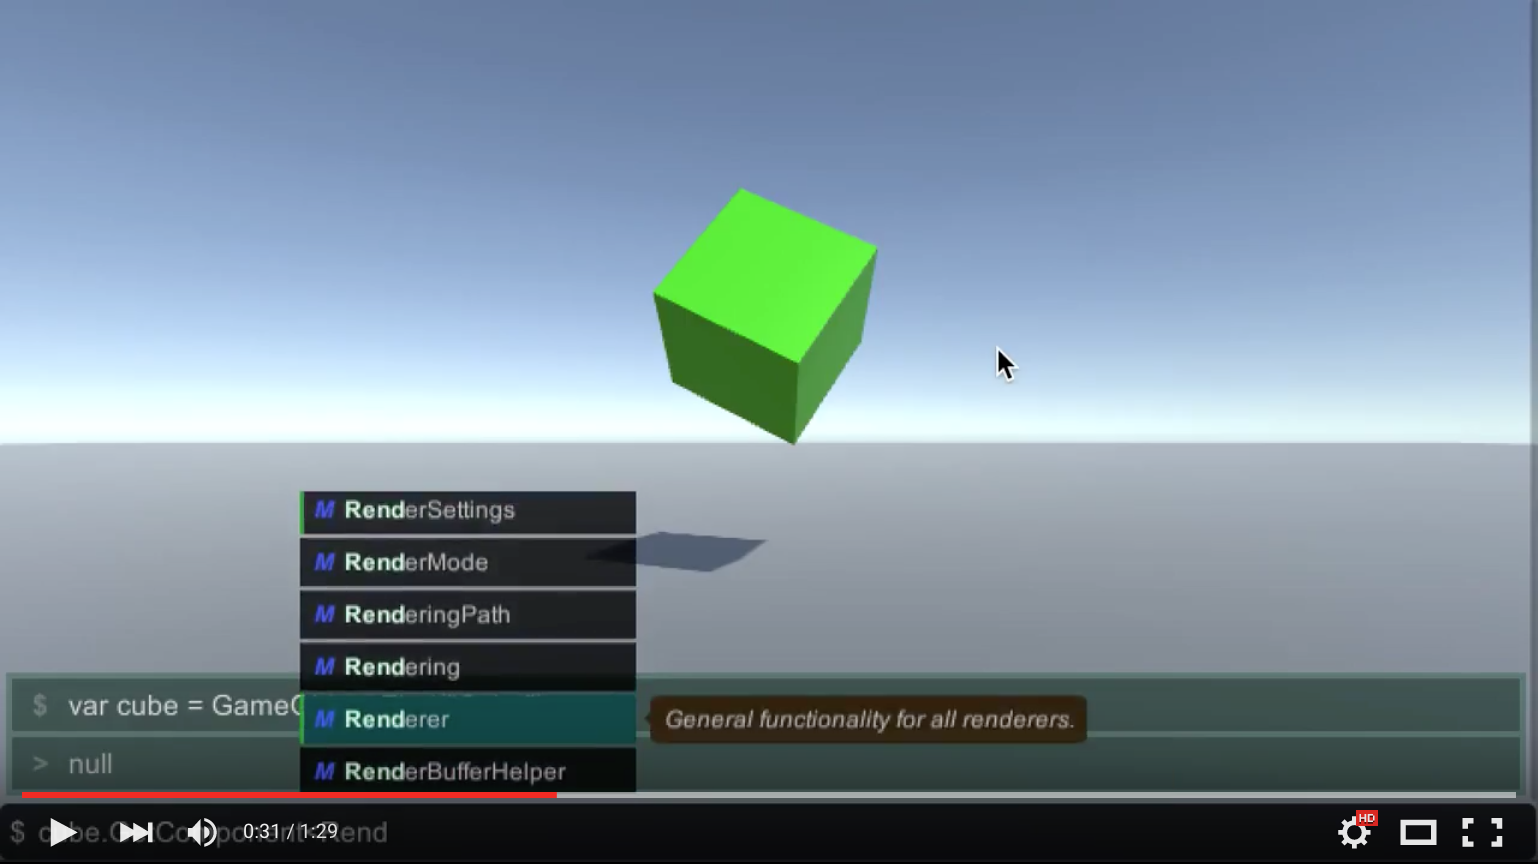
uREPL supports three completion methods by default:
- Context
- Command
- GameObject name / path
You can add completion plugins by adding a class that inherits from uREPL.CompletionPlugin and overrides GetCompletions().
This class is derived from MonoBehaviour, so you can collect information using its callbacks.
The following code is a sample for GameObject name completion.
using UnityEngine;
using System.Linq;
using uREPL;

public class SampleCompletion : CompletionPlugin
{
	string[] gameObjectNames_;

	public void Update()
	{
		gameObjectNames_ = GameObject.FindObjectsOfType<GameObject>()
			.Select(go => go.name)
			.ToArray();
	}

	// This method is called from a non-main thread.
	// If you want to use such as GameObject-related data, please get it in the main thread.
	public override CompletionInfo[] GetCompletions(string input)
	{
		var partialName = input.Substring(input.LastIndexOf("\"") + 1);
		return gameObjectNames_
			.Where(name => name.IndexOf(partialName) != -1)
			.Select(name => new CompletionInfo(partialName, name, "G", Color.red))
			.ToArray();
	}
}You can output 3 level logs by uREPL.Log.Output(string), uREPL.Log.Warn(string),
and uREPL.Log.Error(string).
static public class LogTest
{
	static public void ShowLogs()
	{
		uREPL.Log.Output("this is normal log.");
		uREPL.Log.Warn("this is warning log.");
		uREPL.Log.Error("this is error log.");
	}
}
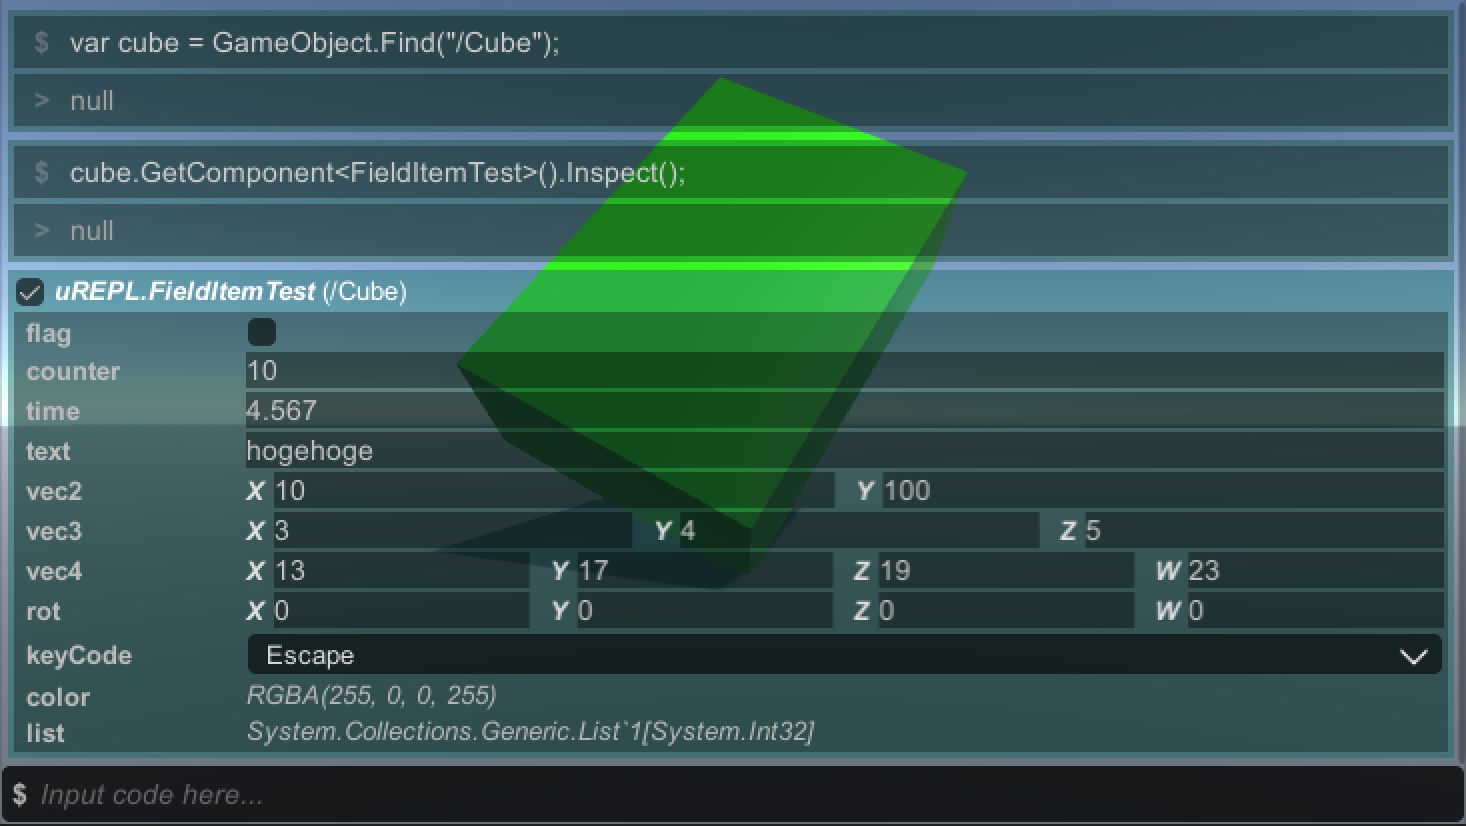
You can inspect GameObject by calling GameObject.Inspect(). This shows position, rotation, scale, and components added to it.
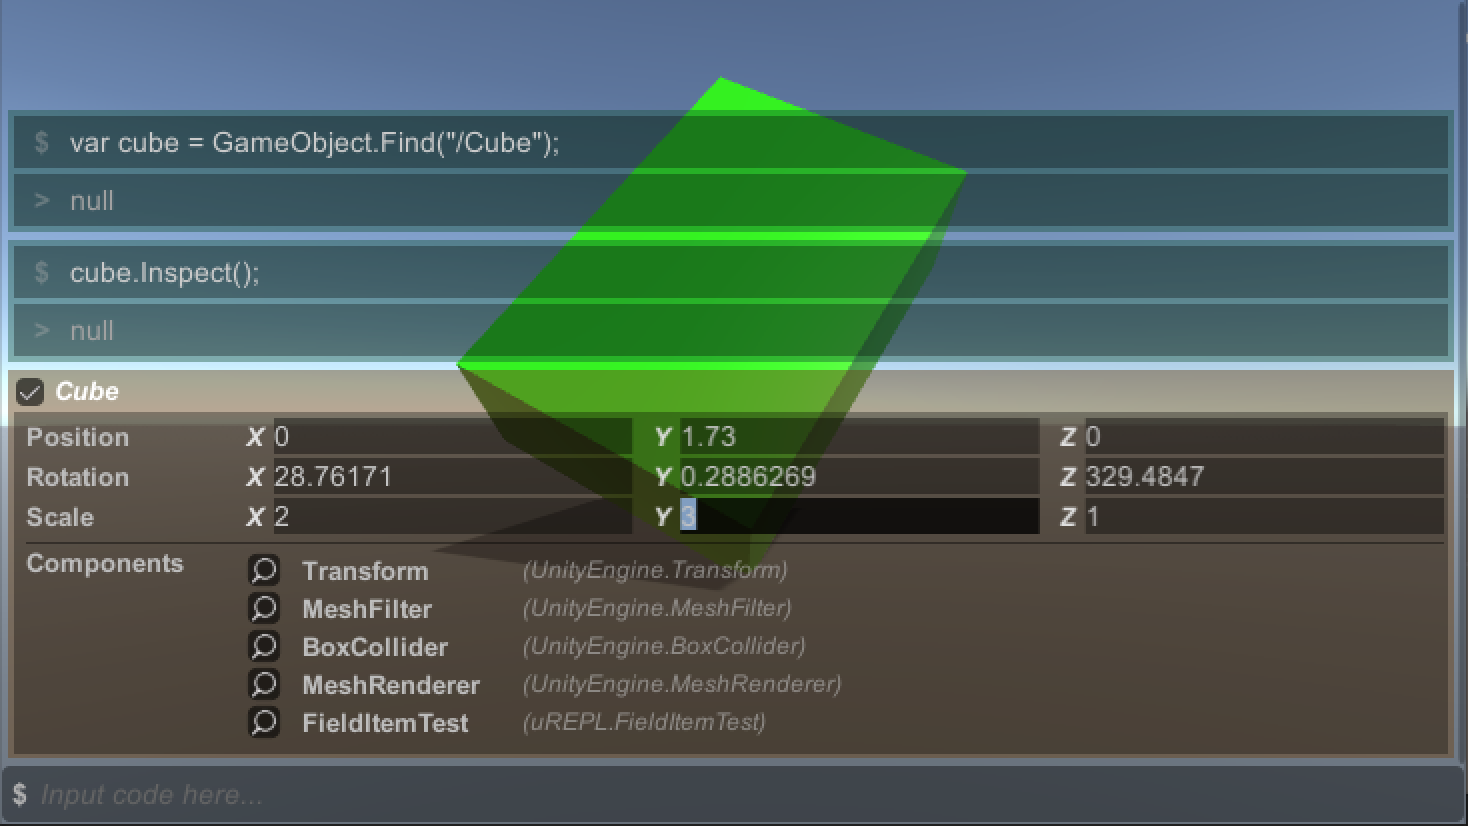
You can also inspect Component by clicking the inspect icon or calling Component.Inspect().
See the following videos for more details:
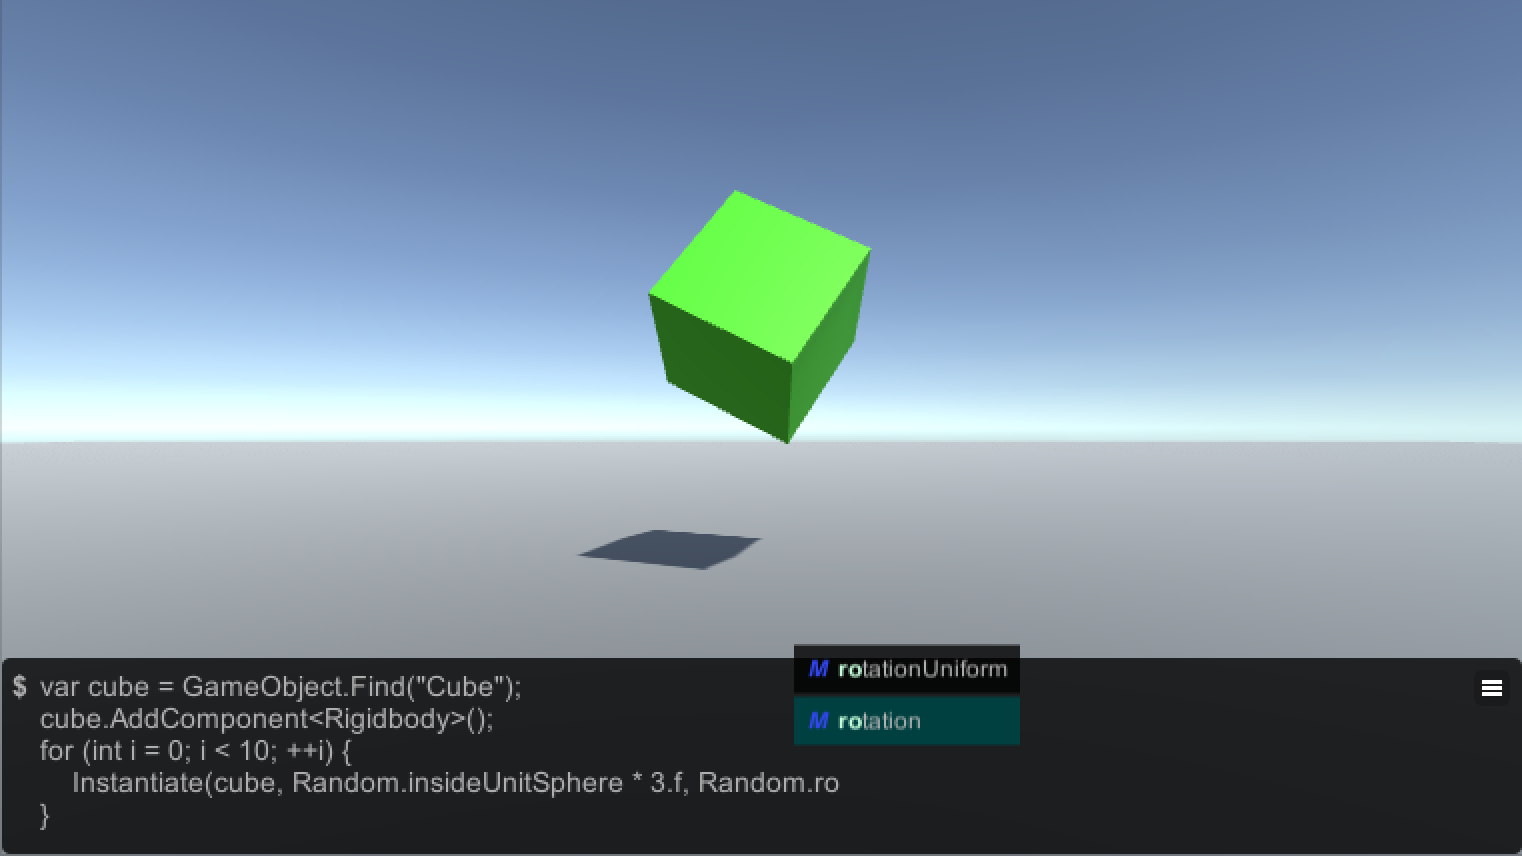
Toggle single-line and multi-line modes by Ctrl-m or clicking the right-top icon in the input area.
- World Space GUI
- Set the
Render Modeof theCanvascomponent asWorld Space.
- Set the
- Multiple GUI
- You can locate multiple GUIs in a scene.
- Builds
- Almost all functions are available even in the built binary.